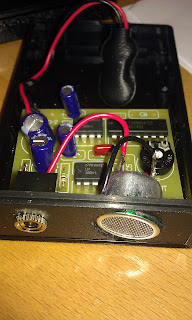
All I need to do now is connect the headphone jack and mount the circuitry into the case. I used a dremel to drill holes into the case for the headphone jack and the ultrasonic transducer / microphone.
This is the printed circuit board that I used. In this picture I've already added two [small components].
This picture is showing the soldeing process. You stick the 'prongs' of the component through the cirucit board and then use the soldering iron to heat the area around the component and then melt the solder onto the area.
Here is the board with nearly all of the components added. [list them]
Here is the back of the board which shows the soldering.
Here is the case with the circuitry in place. I drilled holes in the case using a dremel for the headphone jack and the transducer.


No comments:
Post a Comment